🟦 Plane
Plane is a simple and extensible open source project management alternative to JIRA.

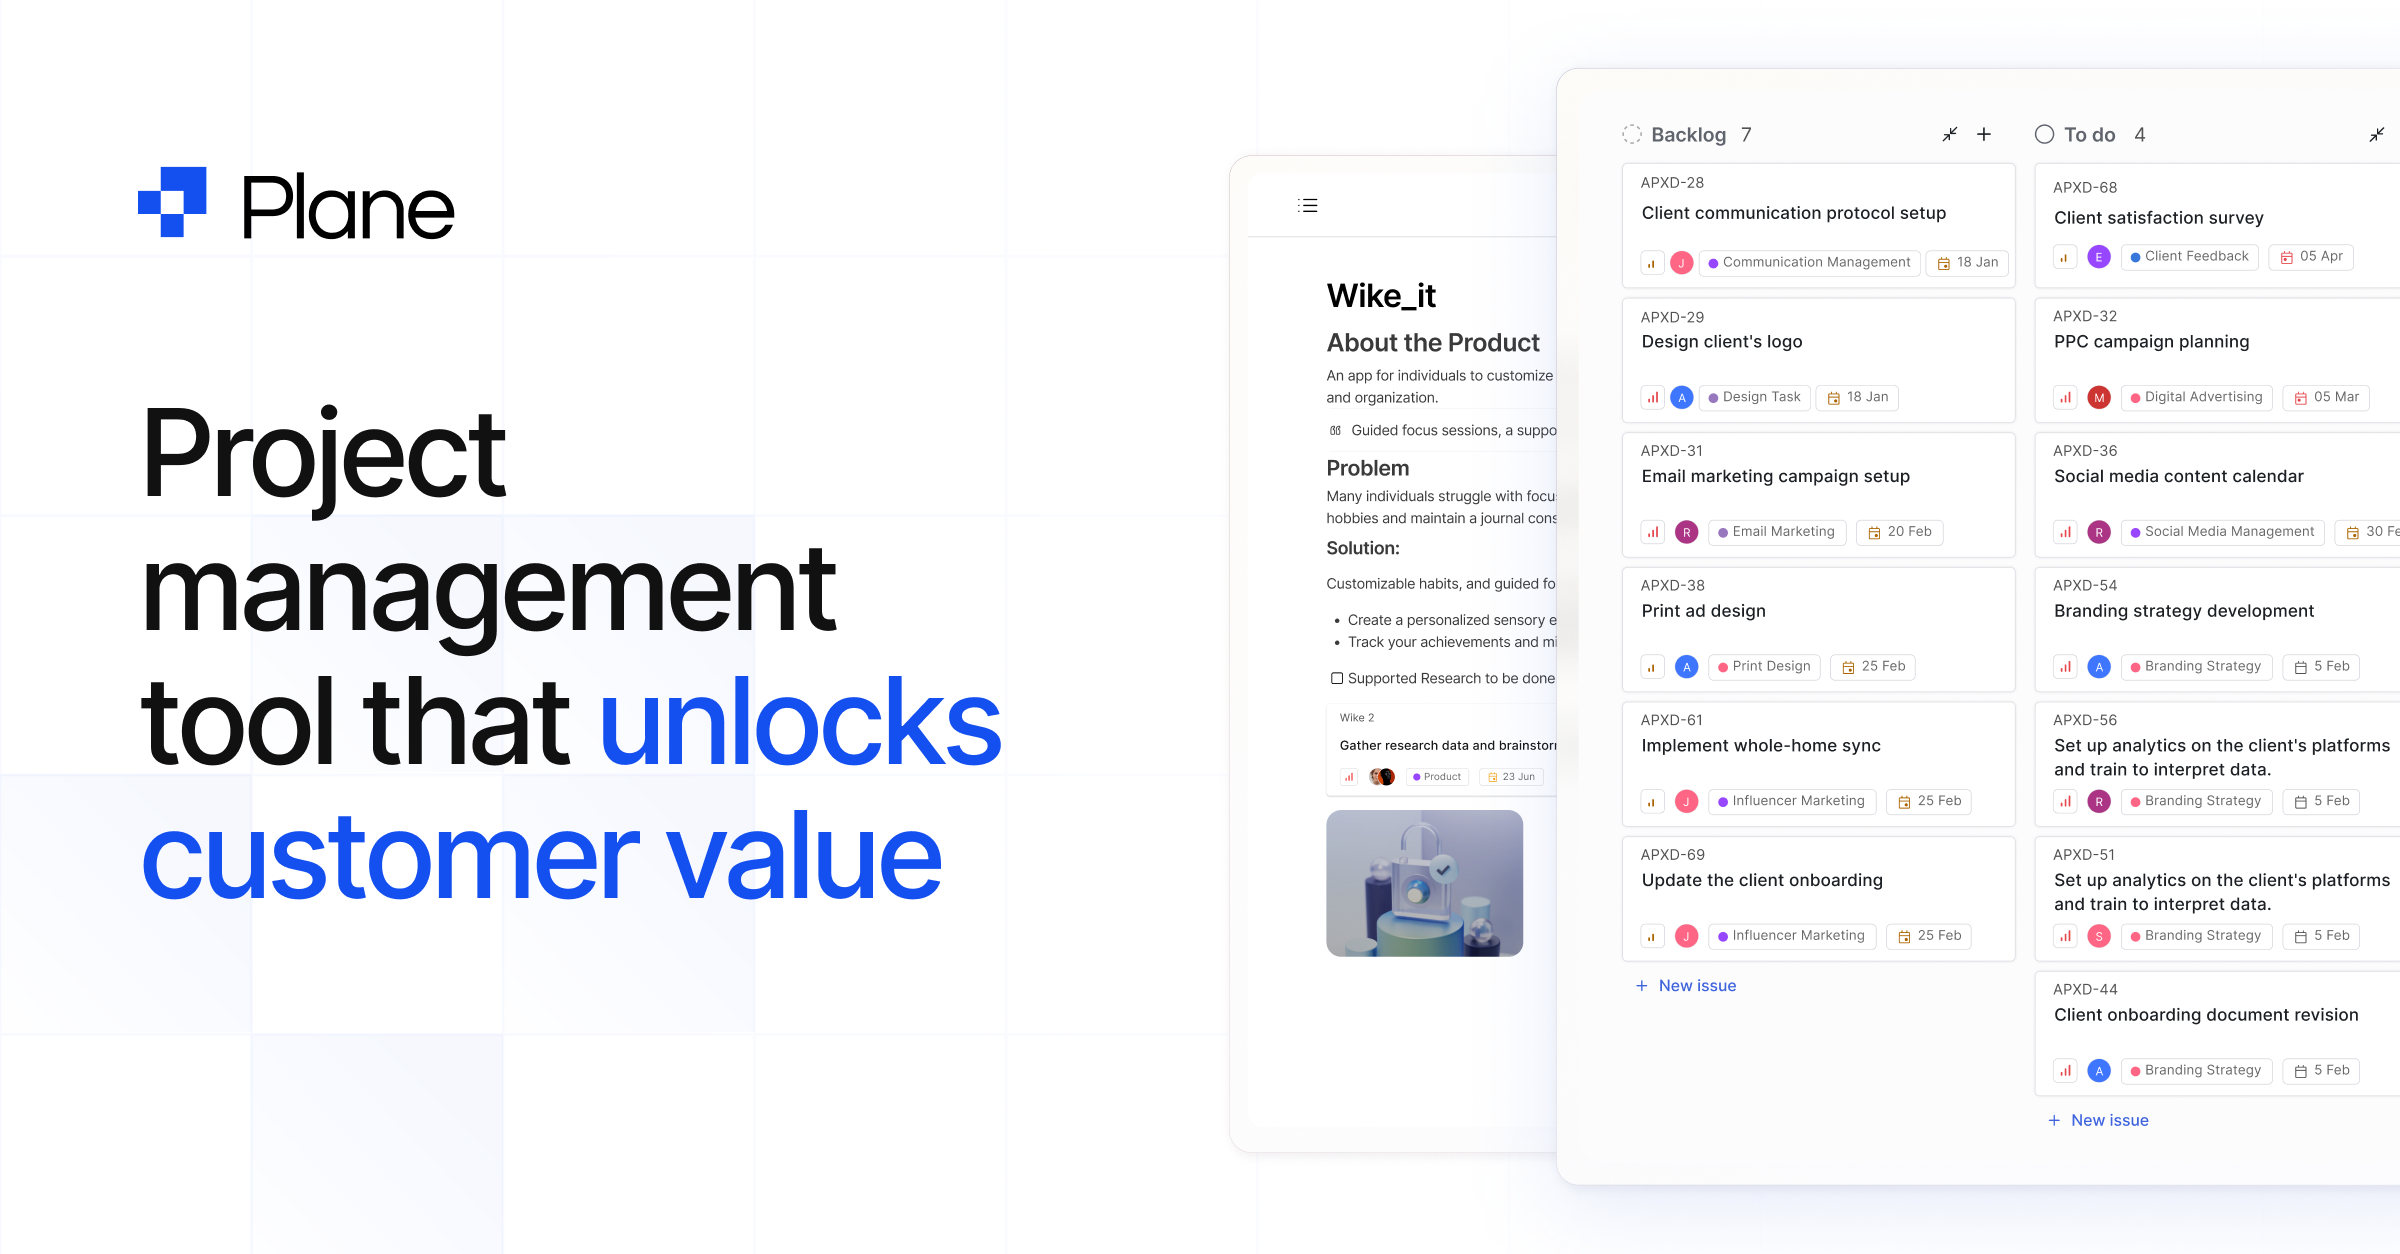
Plane (code) is a simple and extensible open source project and product management tool. It's a popular alternative to JIRA, Linear, and Height. Users can start with basic task tracking and then gradually adopt other project management frameworks like Agile, Waterfall, and others.
Plane helps users manage issues, sprints, and product roadmaps in the simplest way possible, customized to their preferences. It also easily integrates with popular tools like Slack, GitHub, and Notion.
Plane has elegant and well-organized docs and and an active Discord community.
🌠 Features
- Simple, powerful UX - use Plane’s themes and customization tools to tailor your workspace to be intuitive, efficient, and easy to use
- Views - visualize issues as List, Kanban, or Calendar
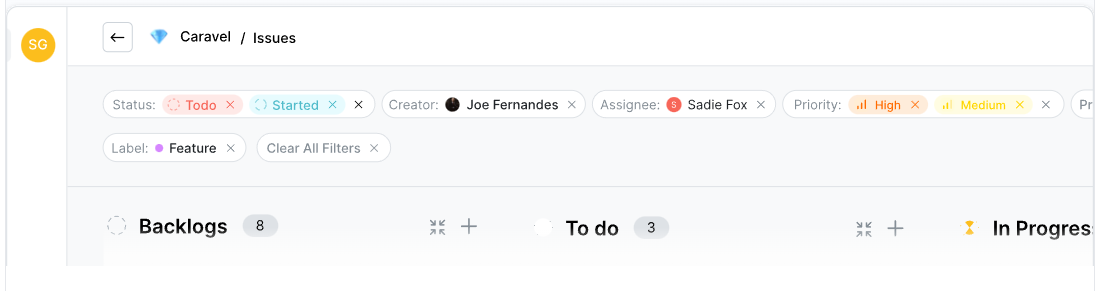
- Cycle and Modules - simplify your team’s transition to Waterfall or Agile workflows by organizing projects with Cycles (custom time periods) and Modules (grouping and organization within specific time frames)

- Extensible - extend or integrate with tools like Slack, GitHub, Discord, Notion, and Excel

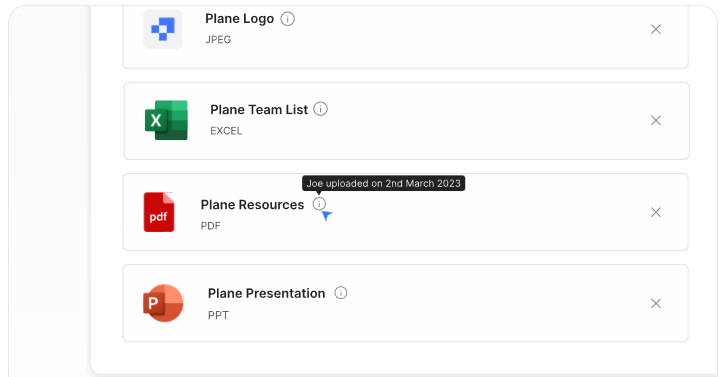
- Attachments - securely attach relevant files to issues
- Security - Data encryption and regular security updates protect your data and privacy
🤖 As described by AI
(written by AI, edited by humans)
Plane is an innovative open source project management tool. It empowers teams to efficiently manage issues, sprints, and product roadmaps with ease and confidence. Key features include easy setup, customizable workflows, versatile views, Agile and Waterfall support, and integration and extensibility.
Plane combines ease of use with customization options and integrations, making the software a valuable and versatile resource for teams across various industries and project management methodologies.
👟 Getting started with Plane
Host Plane yourself using Docker, or get started with Plane Cloud.
Plane Cloud
Getting started with Plane Cloud is simple — just sign up and create a new workspace, and then check out the docs to read about the platform’s core concepts.
Self Hosting
To self host, follow the steps below:
- Install with Docker Compose
git clone --depth 1 -b master https://github.com/makeplane/plane.git && cd plane
2. Run setup.sh
./setup.sh http://<your_ip|domain_name>3. Set environment variables
# Frontend
# Extra image domains that need to be added for Next Image
NEXT_PUBLIC_EXTRA_IMAGE_DOMAINS=
# Google Client ID for Google OAuth
NEXT_PUBLIC_GOOGLE_CLIENTID=""
# Github ID for Github OAuth
NEXT_PUBLIC_GITHUB_ID=""
# Github App Name for GitHub Integration
NEXT_PUBLIC_GITHUB_APP_NAME=""
# Sentry DSN for error monitoring
NEXT_PUBLIC_SENTRY_DSN=""
# Enable/Disable OAUTH - default 0 for selfhosted instance
NEXT_PUBLIC_ENABLE_OAUTH=0
# Enable/Disable sentry
NEXT_PUBLIC_ENABLE_SENTRY=0
# Enable/Disable session recording
NEXT_PUBLIC_ENABLE_SESSION_RECORDER=0
# Enable/Disable event tracking
NEXT_PUBLIC_TRACK_EVENTS=0
# Slack for Slack Integration
NEXT_PUBLIC_SLACK_CLIENT_ID=""

# Backend
# Debug value for api server use it as 0 for production use
DEBUG=0

# Error logs
SENTRY_DSN=""

# Database Settings
PGUSER="plane"
PGPASSWORD="plane"
PGHOST="plane-db"
PGDATABASE="plane"
DATABASE_URL=postgresql://${PGUSER}:${PGPASSWORD}@${PGHOST}/${PGDATABASE}

# Redis Settings
REDIS_HOST="plane-redis"
REDIS_PORT="6379"
REDIS_URL="redis://${REDIS_HOST}:6379/"

# Email Settings
EMAIL_HOST=""
EMAIL_HOST_USER=""
EMAIL_HOST_PASSWORD=""
EMAIL_PORT=587
EMAIL_FROM="Team Plane <team@mailer.plane.so>"
EMAIL_USE_TLS="1"
EMAIL_USE_SSL="0"

# AWS Settings
AWS_REGION=""
AWS_ACCESS_KEY_ID="access-key"
AWS_SECRET_ACCESS_KEY="secret-key"
AWS_S3_ENDPOINT_URL="http://plane-minio:9000"
# Changing this requires change in the nginx.conf for uploads if using minio setup
AWS_S3_BUCKET_NAME="uploads"
# Maximum file upload limit
FILE_SIZE_LIMIT=5242880

# GPT settings
OPENAI_API_KEY=""
GPT_ENGINE=""

# Github
GITHUB_CLIENT_SECRET="" # For fetching release notes

# Settings related to Docker
DOCKERIZED=1
# set to 1 If using the pre-configured minio setup
USE_MINIO=1

# Nginx Configuration
NGINX_PORT=80

# Default Creds
DEFAULT_EMAIL="captain@plane.so"
DEFAULT_PASSWORD="password123"

# SignUps
ENABLE_SIGNUP="1"
# Auto generated and Required that will be generated from setup.sh
NEXT_PUBLIC_API_BASE_URL=http://<your_ip|domain_name>
SECRET_KEY="<redacted>"
WEB_URL=http://<your_ip|domain_name>
4. Bootstrap Plane with Docker Compose
docker compose -f docker-compose-hub.yml up
5. Then sign in and enjoy your new Plane instance
Open your browser and go to http://<your_ip|domain_name>/ to sign in to your Plane instance.
To see more details about self hosting Plane, check out the documentation.