📁 Dropzone.js
Dropzone.js streamlines file uploads with visually polished design.
If you encounter any issues (or if you prefer), just send an email with the subject "unsubscribe" to admin@awsmfoss.com – I'll unsubscribe you myself.
Dropzone.js (Code) is an open-source JavaScript library that empowers web developers by providing drag-and-drop functionality for file uploads.
User-friendliness is paramount for web developers, and this is where Dropzone.js shines. Dropzone enables:
- Intuitive drag & drop
- Image previews
- Image uploads
These unique features coupled with its ease of integration have cemented Dropzone.js as a popular choice for web developers.
🌠 Features:
Some of the features of Dropzone.js are
- Visually Polished by Default: Provides a visually appealing user interface out of the box.
- Progress Bars for File Uploading: Includes progress bars to keep users informed about the status of file uploads.
- Large File Support: Capable of handling large files efficiently.
- Retina Enabled: Optimized for high-resolution displays, ensuring a crisp and clear user experience.
- Completely Customizable: Offers extensive customization options to tailor the appearance and behavior according to specific project requirements.
- Multiple File Support with Asynchronous Uploads: Allows users to select and upload multiple files simultaneously with asynchronous handling, improving overall user experience.
- Browser Image Resizing: Enables users to resize images directly in the browser before uploading, reducing server load and enhancing performance.
- Chunked File Uploads: Supports uploading large files in smaller, manageable chunks through different HTTP requests, ensuring reliability and efficient data transfer.
- Well Tested: Undergoes thorough testing procedures to ensure stability, security, and compatibility across various browsers and environments.
📺 A video introduction
Here's a great guide on how to get started with Dropzone.js in video form:
👟 Getting Started
Here are the steps to get started with dropzone.
- Add dropzone to your project using npm. You can use any package manager
// using npm
npm i dropzone

// using yarn
yarn add dropzone
2. In your html make sure you have this element
<!-- Example of a form that Dropzone can take over -->
<form action="/target" class="dropzone"></form>
3. Import dropzone into your JavaScript file. There are many ways to import a module in JavaScript but we are using Standard method provided by ECMAScript.
// If you are using JavaScript/ECMAScript modules:
import Dropzone from "dropzone";

// If you are using CommonJS modules:
const { Dropzone } = require("dropzone");

// If you are using an older version than Dropzone 6.0.0,
// then you need to disabled the autoDiscover behaviour here:
Dropzone.autoDiscover = false;

let myDropzone = new Dropzone("#my-form");
myDropzone.on("addedfile", file => {
  console.log(`File added: ${file.name}`);
});
4. For CSS dropzone comes with a basic.css and dropzone.css. You can use basic.css and style on top of it.
For more information refer to Dropzone's official guide.
🪧Demo
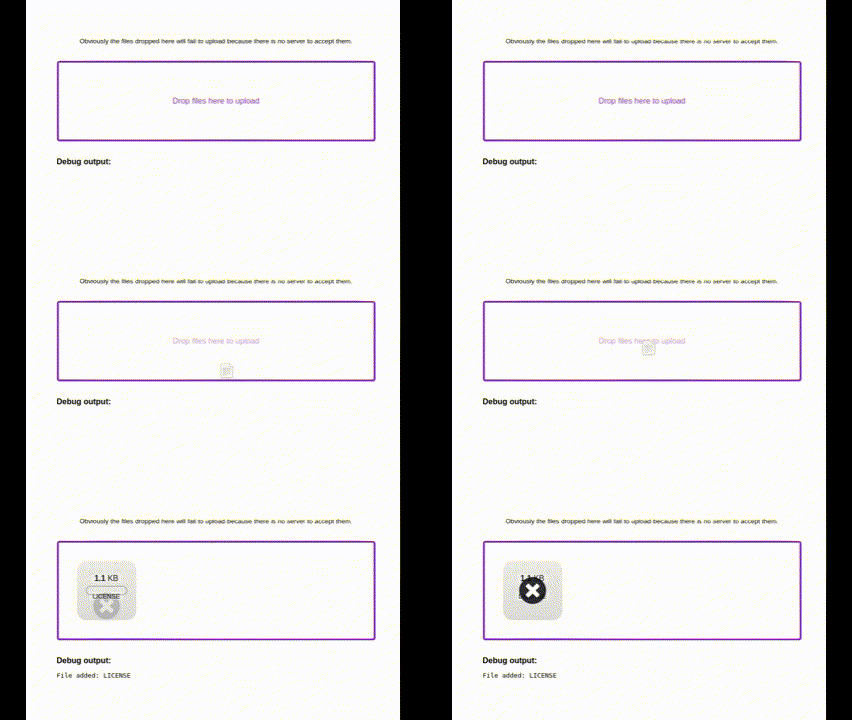
Let's create a simple demo of Dropzone.js using webpack.
- First of all initialize node.js in your project
npm init2. Install dependencies
npm install webpack css-loader style-loader3. Create index.html file in your root directory and paste this code
<!DOCTYPE html>

<meta charset="UTF-8">
<meta http-equiv="X-UA-Compatible" content="IE=edge">
<meta name="viewport" content="width=device-width, initial-scale=1.0">
<title>Dropzone Example</title>

<main>
  <small>Obviously the files dropped here will fail to upload because there is no server to accept them.</small>

  <form class="dropzone" id="my-form" action="/"></form>

  <h1>Debug output:</h1>
  <pre id="output"></pre>
</main>

<script src="dist/main.js"></script>

</body>
</html>
4. Create a src directory in your root directory and inside it create two new files and index.js and style.css
mkdir -p src && cd src
touch index.js style.css
5. Paste this code inside inside index.js file
import Dropzone from "dropzone";
// Optionally, import the dropzone file to get default styling.
import "dropzone/dist/dropzone.css";
import "./style.css";

const myDropzone = new Dropzone("#my-form");

const output = document.querySelector("#output");

myDropzone.on("addedfile", (file) => {
  // Add an info line about the added file for each file.
  output.innerHTML += `<div>File added: ${file.name}</div>`;
});
6. Your style.css should look like this
body {
  font-family: helvetica, arial, sans-serif;
  padding: 6rem;
}
main {
  max-width: 40rem;
  margin: 0 auto;
}
.dropzone {
  border: 4px solid blueviolet;
  color: blueviolet;
  margin: 2rem 0;
}
small {
  display: block;
  text-align: center;
}
h1 {
  font-size: 1em;
}
7. Since this depends on webpack, the dist/main.js needs to be built. Run this command
npx webpack8. Open the index.html file you created in the browser (you might have to go to File > Open and navigate to the folder your created)

For comprehensive guidance and detailed information on integrating, customizing, and maximizing the features of Dropzone.js, please refer to Dropzone.js's official documentation.

